A Pull Zone is an essential feature designed to enhance your website’s performance by accelerating content delivery across the web. Here’s how you can create a Pull Zone to optimize your site’s speed and reliability.
1. Login to your RocketDime CDN Dashboard.
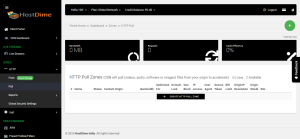
2. Navigate to the HTTP section:
3. Create a New Pull Zone:
- Click on the Green Plus Button located at the top right corner.
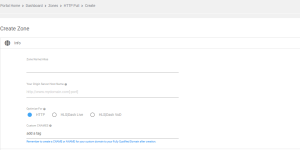
- Provide a Zone Name.
- Enter your static website’s URL in the field labeled Your Origin Server Hostname. This is the URL that needs to be accelerated.
- Optimize for Specific Delivery Types:
- Select the type of optimization you need under Optimize For:
- HTTP Optimization for general website delivery.
- HLS/Dash Live or HLS/VoD Live for live streaming or on-demand content.
- Choose the optimization option based on your content requirements.
- Select the type of optimization you need under Optimize For:
4. Custom CNAME (Optional):
- You can set a custom CNAME to retrieve your content, allowing requests to be redirected to our CDN.
- To use a custom CNAME, you’ll need to contact your DNS provider and add the CNAME in your DNS records, pointing it to the CDN.
5. Cache Settings:
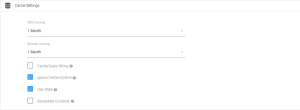
- You can configure the cache expiry period as needed under Cache Settings.
6. Origin IP Resolution configures your zone to use a different IP address for your origin server.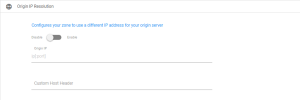
7. Origin Shield: Enhanced Protection Against High Server Loads
- Origin Shielding, also known as a precache server, provides an extra layer of protection against heavy server loads. By minimizing the number of requests from CDN edge servers to the origin server, it helps optimize performance and reduce strain. With shielding enabled, only designated precache servers interact with the origin host, eliminating the need for direct communication from all CDN edge servers.
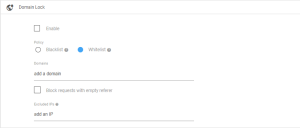
8. Domain Lock: Enables or disables access to your website for specific domains.
9. Geo Block: Controls website access by geographical location, with the flexibility to exclude specific IPs within the region.
10. IP Access: Manages website access by allowing or blocking specific IP addresses for enhanced control and security.
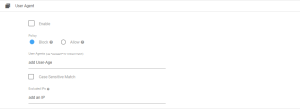
11. User-Agent Policy: Defines access rules based on User-Agent strings.
- User-Agents: Specify User-Agent patterns using
*useragent*for wildcard matches. - Add User-Agent: Add specific User-Agent strings to allow or block.
- Excluded IPs: Exclude certain IP addresses from User-Agent-based restrictions for flexibility.
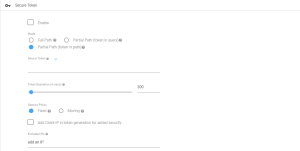
12. Secure Token Policy: Implements access control using secure tokens to ensure only authorized users can access your website.
- Mode: Describe the desired mode to enable or disable secure token authentication.
- Secure Token: Activate a unique token for user sessions.
- Token Expiration: Set the token’s expiration time (in seconds), default is 300 seconds.
- Session Policy: Manage session-based access rules.
- Excluded IPs: Specify IP addresses exempted from secure token validation for flexibility.
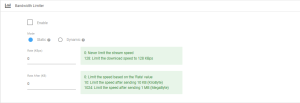
13. By setting the Bandwidth Limiter you can limit the speed based on the ‘Rate’ value after reaching a specified Bandwidth Limit.
14. SSL Type:
- Select Shared SSL to deliver content using the default pull zone hostname.
- If using a custom CNAME, select Free SSL for secure delivery.
15. Deploy the Pull Zone:
- Click the Deploy Button to finalize and implement your Pull Zone.

